Table of Contents
This guide provides an overview of how to add scripts to your DX1 website.
The Website Scripts feature allows dealership users to add third-party tracking, marketing, and interactive scripts to their DX1 website without needing to create a Support ticket. This tool allows you to easily inject HTML, JavaScript, or tracking pixels exactly where they need to go.
⚠️ WARNING: There is no built-in code validation. You must pre-validate your code (ensure tags are closed and syntax is correct) before saving. Entering broken code can disrupt your website’s functionality or layout.
Field-by-Field Breakdown
| Field Name | Description & Best Practices |
| Active | Toggle (On/Off). When toggled On, the script will be actively injected into your live site. Use this to safely turn off a script for troubleshooting without deleting the code permanently. |
| Script Name | Required. A descriptive name to detail what the script is and who provided it (e.g., Google Analytics 4, Facebook Pixel Base Code). |
| Script Placement | Required. Determines exactly where the code will be injected within the website's HTML architecture. (See "Placement Guide" below for exact locations). |
| Script Code | Required. A text-only field where you paste your code. Any rich-text styling copied from an HTML source is automatically stripped out. Note: DX1 will auto-wrap your contents in |
| Noscript Code | Optional. This field only displays if "Site Head" is selected as your placement. DX1 will automatically wrap this in |
| Page Display | By default, this is set to "Select All", which applies the script globally to every page on your site. You can override this by selecting specific individual pages (or subsets of pages) if a script only needs to load in certain areas. |
Guided Tour
Step by Step
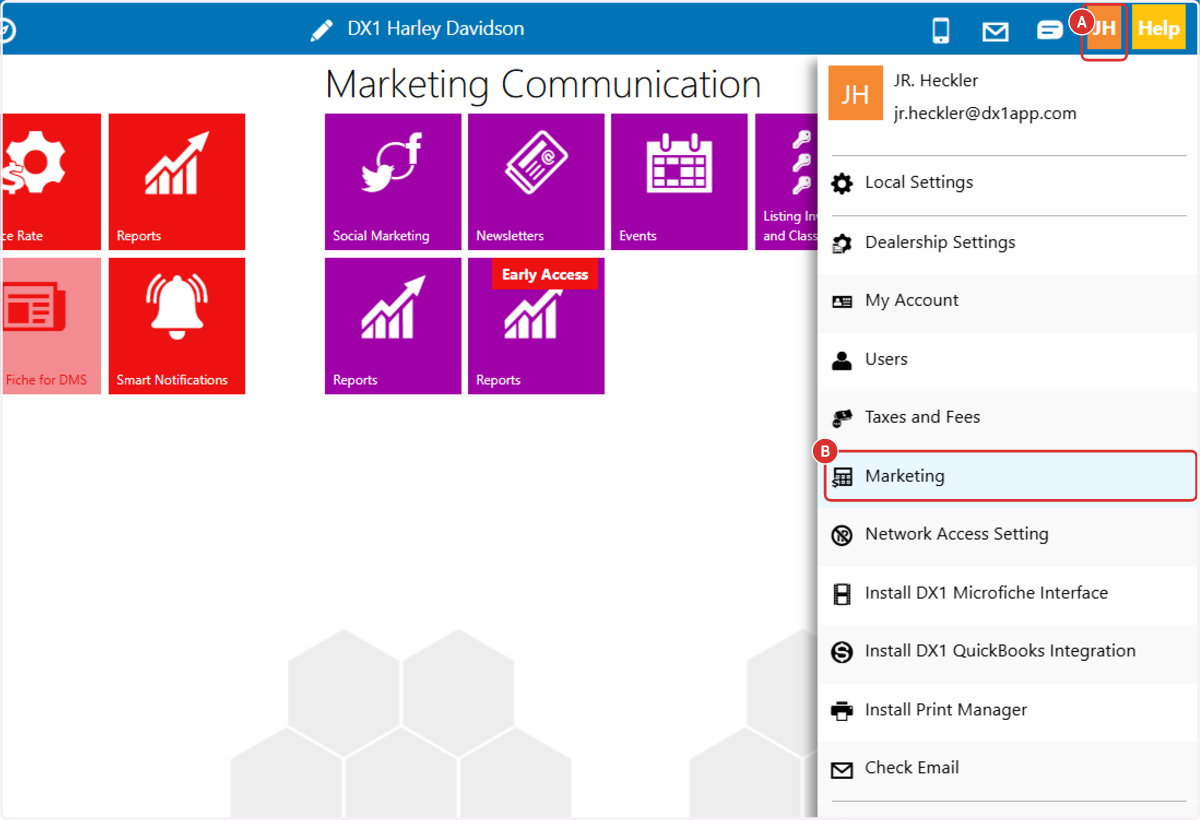
1. A. Select your user account initials in the upper right hand corner of the dashboard.
B. Select Marketing
2. Select the website where your new script should be added.

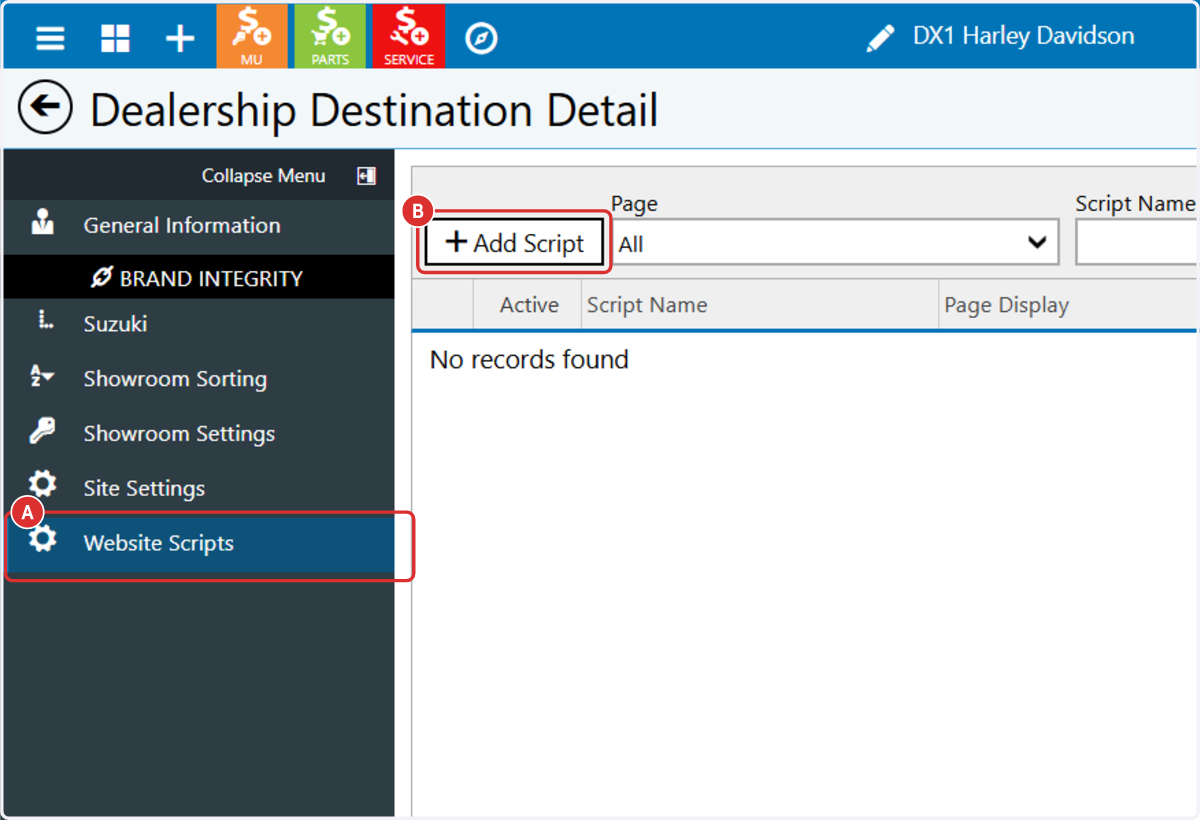
3. A. Select the 'Website Scripts' menu option in the left hand menu.
B. Select '+ Add Script'
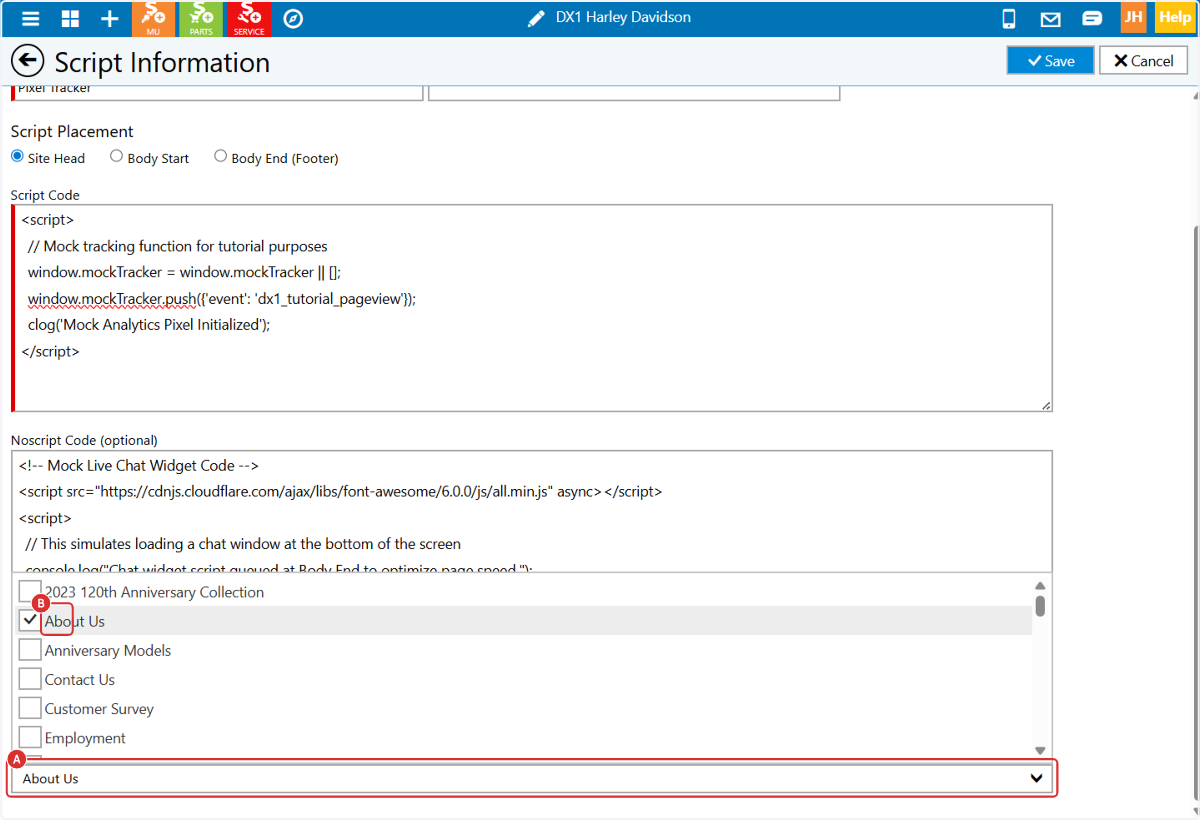
4. Enter a name for the script you are adding, eg 'Pixel Tracker'
Choose a name that is most useful for later reference- 'Google Analytics,' 'Facebook Pixel,' etc

5. Enter/paste your script into the Site Code input box.
Choosing your Script Placement:
1. Site Head (<head>)
Where it goes: Injects the script within the
<head>of the site, immediately after the information in the website Page Header Tags field.Best used for: Primary tracking platforms (like Google Analytics or Meta Pixel) that need to load immediately before the visual components of the page appear.
2. Body Start
Where it goes: Injects the code after the opening
<body>tag and immediately before the main<form>element.Best used for: Noscript fallback data containers (like Google Tag Manager's noscript tag) or visual elements that must load alongside the very top of the page body.
3. Body End (Footer)
Where it goes: Injects the code after the closing
</form>tag and immediately before the closing</body>tag at the bottom of the page.Best used for: Heavy scripts, interactive widgets (like Live Chat), and tools that are not critical to the initial page rendering. Loading these last prevents them from slowing down your site.

6. If you are entering a <noscript> tag, enter that into the 'Noscript code' input.
The <noscript> tag is an HTML element used to display alternative content to users who have JavaScript disabled in their browsers or whose browsers do not support scripting. It ensures your page remains usable and provides essential information even when scripts are unavailable

7. Page Display: By default, scripts will appear on every page of the website. Uncheck the 'Select All' box to open the page selector dropdown.

8. A. Click on Select pages
B. Select the pages where your script(s) should appear.
9. Click on 'Save' to apply your changes immediately.

10. You can deactivate a script at any time without deleting it by setting the 'Active' toggle top the OFF position.

